Thursday, December 24, 2015

Exhaust and other details


The bike rebuild continues to progress.  Next up was mounting the exhaust (again).  I used new gaskets to ensure a good seal.  I'm considering getting them ceramic coated, but I'll see what color they turn once the bike has been run.  They are stainless, of course.

The muffler now mounts to the footpeg bracket, and you can see the R1 aluminum bracket I've used.  Red stuff isn't blood for once, some red locktite to hold it in place.  There is a rubber bushing at play here, which should help isolate the vibes.

Some small details -- this is a piece of coat hanger wire, repurposed to hold the rear brake hose away from the shock.  I used a "00" jeweler's tip and a bit of rod to seal off the "circles" ast each end, and then painted it black.

You know when you are a mechanic when you see the beauty in carburetors.

Gotta love the decal.  FCRs, baby!

The rear subframe; I've glued/siliconed the aluminum spacers in place, obviously the seat pan goes on top.  Cafe seat is currently being wet-sanded in prep for graphics and another coat of clear (along with the front fairing).

Saturday, December 19, 2015

forks are back...


And the bike is on stands.  Front wheel is now centered in the forks, and the caliper is centered on the rotor.  Should be nice to have it brake properly, and of course the new pads help.  I've brought the wheel inside to protect the integrity of the new tires.  -35 degree (celcius) weather is not nice on grippy rubber.

Here's the tail.  Not spaced properly yet, but it gives an idea of the color, as well has how much better this coat of clear went on.  Again, some youtube research has paid off.

I ground the key mount off the triple clamp, and then removed the anodizing.  Again, not a perfect, polished look, but that wasn't what I was going for.


Considering putting some race numbers on the back, and then clearing over it again.  Wet sand first, of course.  Silver numbers with a blue outline.  Need to think on it a bit more...

Sunday, December 13, 2015

The Rebuild

Frame and sundries back from the powdercoaters, so it's time to build!  Doing my best not to let it sit on the concrete floor and scratch the coating!

Steering stem bearings installed.  These went in fairly smoothly, with no aggro as the coater did a good job masking off the bearing pockets.

The lower frame caps were powdered with a textured effect just so it wasn't all gloss black.  The front engine mount and the subframe got the same treatment as these pieces will also be subject to some road abuse.

Rag in place to protect the underside of the frame during assembly.  Some dremel work was needed in a few bolt holes.  Prefer a snug fit than loose and rattling!

Swingarm in, shock mounted, and engine bolts still finger tight for now.  Factory milk crate in place.

Rear subframe in place, along with front engine mount/cradle.

Coil with new wire also mounted, and engine bolts/swingarm shaft snugged up.  Front end is still at the machinist's getting the wheel centered in the (now straight) triple clamps, and the front caliper mounted properly.


Sunday, November 29, 2015

Three on the go

I'm currently involved in 3 projects... a good thing, as it keeps me busy over the winter.  Without this I might take up an expensive, dangerous habit.
First the 'mono.  I've stripped the tank back to bare metal.  Not that I am a steampunk fan or rat rod person, I just like the look.  The seat and fairing will be black, with a textured finish.  This will "force" me to concentrate on the mechanical side of the bike, and not spend so much time over appearances.  Yeah, it can't look like a nail, but I am going to ride the thing!  The blue tank cap looks nice against the metal.

However,  1 cool and 1 not so cool things came up.


The cool...  Some neat brazing became apparent.  This is at the front of the tank where there is a tough weld area.  You can see brass spot welds as well as a bead along the front.  Looks fine in my opinion.  Bracket that affixes to the rubber strap is also secured this way.  You can still see a bit of paint leftover I need to tidy up.  The epoxy base or primer on this tank is very tough!


Not so cool...  Dent #1 and...


Dent #2.  Don't care, I'm leaving it as is.  I'll call this  "patina".  Someone did a great job with bondo/filler at one point.  Never noticed it under the paint.


Some more work on the zx7r front.
J Model swingarm (far lighter than the P model, and allegedly lighter than the zx9r model).  Big difference is that the shock tunnel is box-section and welded on the J bike, and the P swingarm has a big forged section.  The P swingarm likely took far less time to build in the factory, with perhaps more strength.  The trade off would be overall weight.


I've installed and bled the Frando brake and clutch masters, as well as scored a woodcraft bar end slider/lever guard.  The Chinese lever guard I had previously was pretty weedy.  The clutch feels good, the brakes have a few more bubbles to get rid of!  Next step is to take the swingarm to my welding guru to get a brake caliper hanger stay/tab welded on.

Saturday, November 21, 2015

Cafe Mono News

Its taken awhile, as my tig-welding guru at IronKraft was busy with other projects.  However, he's reworked the exhaust on the CafeMono project, and I've now got it back in the garage.


The under-seat, vibration-prone version 1 has been replaced with hopefully a more comfortable option.  The first part of the work was around the header area, drastically changing the routing, but hopefully re-using the 2-1 junction that we started with.  For some reason, I can't flip this picture for the blog.


At the exit, a small megaphone muffler (yes it has some baffling) is used.  The mount is from an R1, and aluminum bracket with a rubber bushing and tophat spacer.  Should allow some movement and isolate the vibes somewhat.  The rubber bushing is also an individual piece, so it can be ordered separately if it wears out.  Yep, the exhaust fires right on to the delrin rearset bobbin.  We might have to switch that out for something made of metal.  Hiking the exhaust upwards would lead to more clearance problems under the engine.

Sunday, November 8, 2015

A bit more work

Got the front forks returned from Race Tech this week.  New proper weight springs, oil, seals, and bushings.  Should be good to go!


Also got a race tail from Squidskinz.  Its made with polyester resin, not epoxy, so it isn't as flexible as the sharkskinz fairings.  However, it didn't take me that long to fit -- only fabbing a few brackets for the rear mount in aluminum, and relocating the ECU, and it went on pretty well.  Also bought an undertail, so I've come up with a way to mount that fairly effectively with quick-release mounting pins.

You can also see the black pinstripe on the tank I added, and the whole lot has been clearcoated.  Lower bellypan fairing is currently being painted, then the tail, and then finally the upper.  I also got a set of vortex rearsets fairly cheaply, which seem far sturdier than the pro-tek ones I had, which I will keep as a spare set.
GPR damper mount on the triple.  I swapped out the nice oberon nut, as it will be covered up when the damper is installed.  Frando brake and clutch levers are also on, and everything clears everything... the kurvygirl resevoir mounts help here!  You can also see the absence of a keyed switch, replaced with the on/off switch on the left handlebar.  I also now need to shorten the throttle cable, and come up with some sort of choke cable solution.

Saturday, October 24, 2015

The future plans

As you can see by some of the pics below, the zx7R is being converted to a more single-minded machine.  Will it end up as a racebike, or a "proper" trackday bike?  That remains to be seen.  The last round at Gimli in Sept. was weird.  I could only stay for the Saturday, and while the weather was warm, the wind was a bit insane.  Worst I'd experienced in nearly 20 years going to that track.  A HUGE tailwind helped with top speeds along the front straight, but turn 1 saw you bending the bike into a nasty crosswind.  While the suspension setup had improved due to my tweaking, I was running way wide, off the track.  After 2 full sessions in the morning, I hit abort after lunch.  The street tires were also past their best on this track, feeling greasy and I was getting a few minor front and rear slides.  No sense throwing the bike away at this point.
That being said, I turned some consistent 1:06s when the weather cooperated.  Far from record or even competitive times, but I was certainly not pushing it.  The drive home allowed me to thing of all the "if only"'s...
- the gearing is a mile off -- too tall for the track.  A proper track setup would allow me far better acceleration
- proper race tires should be worth a few seconds a lap -- Dragon Supercorsas would be the next step
- weight -- me (about 10lbs) and the bike (hopefully more)
- suspension -- the forks need some work

The mental attitude as well, that this is a track-only bike should allow me to push it a bit and chase some lap times.  My best ever lap was a low 1:05 on the ex650, and I then promptly crashed out of that race.

The plan (some of which you can see below)

1.  Fit proper race bodywork: this should save weight and also be track compliant with an oil-retaining bellypan.  Some please on the zx7r forum got some sharkskinz that needed a bit of work, as well as a very light graves fairing stay.  In the process of patching some holes, and will paint over the winter.  I've ordered a race tail from squidskinz in Canada that is done and on the way.


Thought I'd steal some of the ideas from the Pramac Ducatis.  I think it would look good for a Kawi paint job, as the green is true to the team colors, but I've got red leathers.  Style is important.  Furthermore, Tremclad makes a key lime green and a nice red that is "close".  Won't be a replica, but will end up looking similar.

2.  Get the forks sorted:  one of the seals was weeping, and at my faster pace, I was blowing through the travel.  The preload is too soft for the track, so some heavier springs are in order.  I shipped the lot to race-tech for a rebuild.  From here, I can service the forks, as the gold valves are in, and the springs are correct.  Seals and oil (once I get the correct driver) are all the tools I need.
3.  Race rubber: supercorsas will be ordered in the spring
4.  Brakes:  street compound HH pads are OK, but I want to try some "proper" race pads.  I might blow through them quicker, but if they get the big beast stopped sooner, all the better.
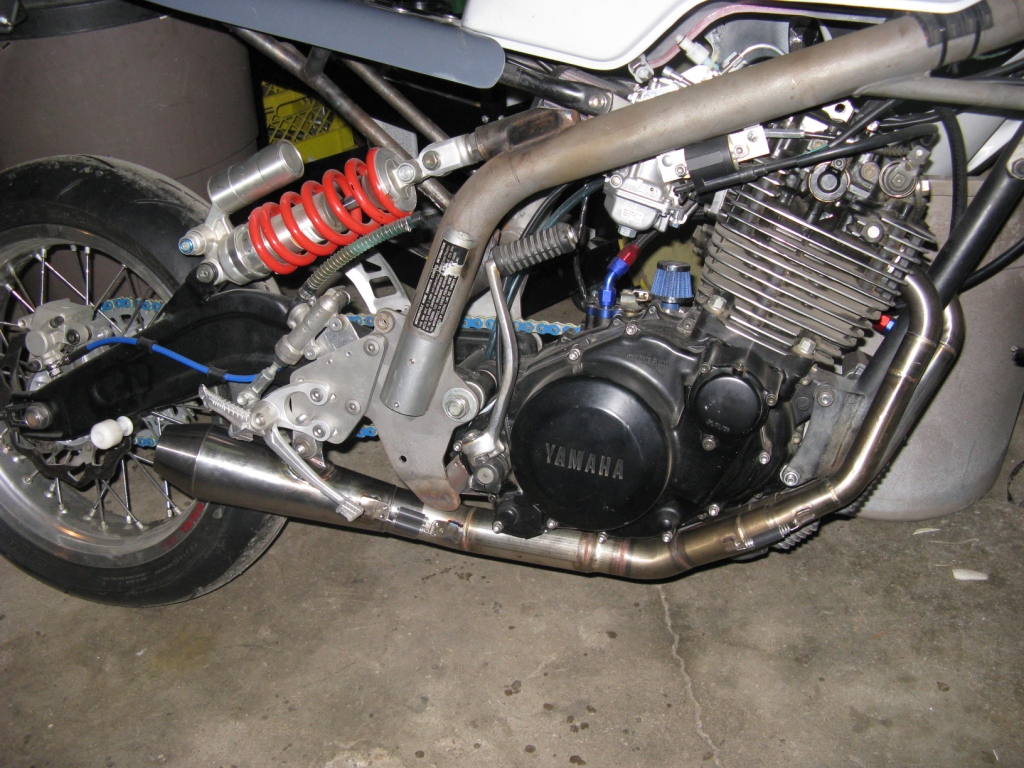
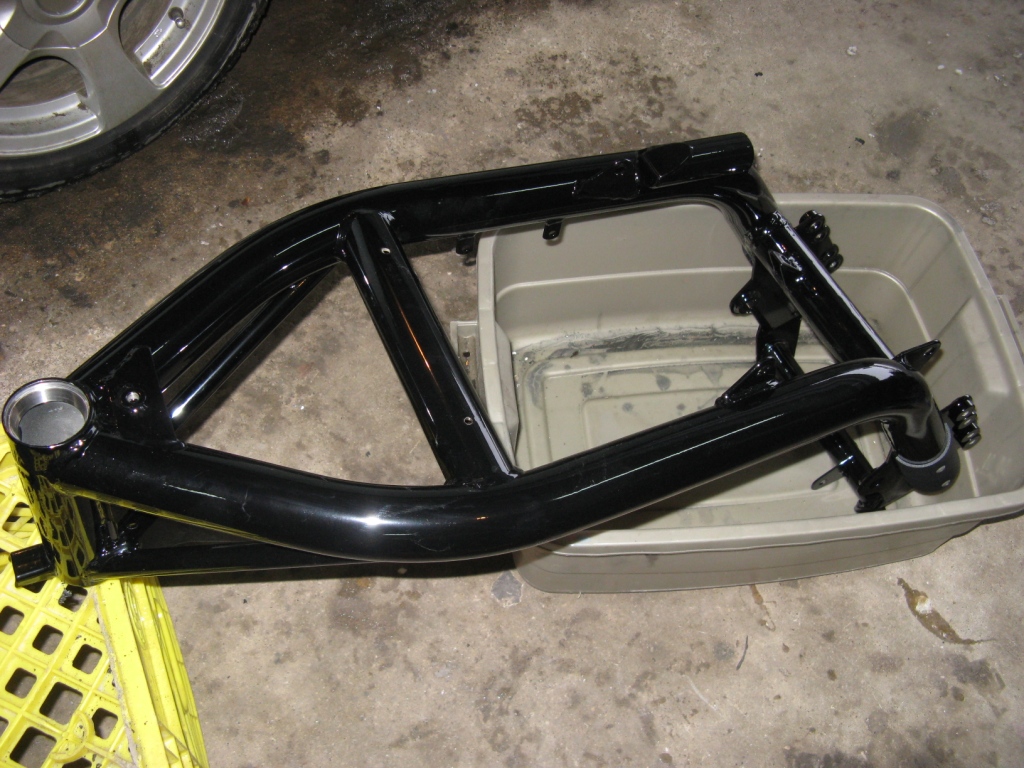
5.  Find some more ways to lose weight: I think the rad resevoir could go (replace with an HRC bottle), and I've already removed the rad fan.  The subframe has been shortened, and the steel bracket to hold the tail lights and reinforce the passenger seat weighed about 5 lbs.  I also swapped out the 20 inch alloy can on the exhaust with a 16 inch titanium one.  I already have a lightweight battery (which I need to bring inside for the winter).  Not sure what else I can do, considering the wheels are already far lighter than stock.  Anything beyond this gets too exotic and very expensive.  Some engine maintenance is due shortly, mainly the valves.  I'll wait until the spring for warmer weather before I tackle that.  I'm still OK based on the engine mileage.  I've also fitted new plugs, air filter (as seen below), and gone up 1 size on the mains to test.

If I can get into the 1:03s, this would put me at the back of the Novice superbike grid.  Most of the sbk bikes are 600s anyway, so whatever.  The design is approaching 20 years old (1996), so the fact that this is a "newer" 1999 makes little difference.  If I can get to those times, then I think I'll sign up for some races.  3 seconds is an eternity, but I might be able to find them if I keep working on setup and continue to get used to the bike.  I really doesn't feel that "hard" to ride as is.

I dunno... I guess I like both the challenge of building a bike (obviously), but prefer the "no hope" status of racing an old one.  I won't podium, but I think I will have fun.  I suppose this bike will eventually qualify for a vintage class somewhere, and maybe I'll make a road trip, perhaps go south and race with the Yanks.  That is a long way off, and makes a pile of assumptions -- that the bike would be legal, and I won't be a rolling chicane out there.

parts for sale


Saturday, October 17, 2015

Monday, October 12, 2015

Saturday, October 3, 2015

 From this
to this in 1 week.  The winter rebuild/tune up begins.

Saturday, September 19, 2015

New Seat, and wiring completed

When I decided to switch the bike over to road use, I soon realized that the version 2 of the seat I had would not be suitable.  There was no "good" location to mount a tail light of any sort, and the pan itself was too narrow.  I had widened it somewhat, but would need a total re-do to make it suitable for the street.  I was out of epoxy resin and hardner (to the tune of about $100), and still needed matt and cloth.  For the price, a new seat that had the correct dimensions was the way to go, and I found one online.  A company in MN had one on ebay, and while the rear bubble is a bit big, it was properly wide enough to fit the subframe rails, once the seat pan had been trimmed for length.

Baby got back.  And a working DOT tail light, licence plate light, and turnsignals.  Sorted!

The ECU is now tucked under the seat, away from the engine heat.  The Baja Harness seemed to work better with it in this location.  Tail harness was a mile too long, but I was able to trim it and use proper OEM bullet connectors.

This needs a tad more trimming and a cleanup, but this aluminum plate helps protect the wiring connections for the rear lighting.

Parking light, like the rear tail light, comes on with the key and the engine stopped, so it's all kosher.  Old rag is protecting the bike from yet another dodgy used R1 master cylinder.  It has the proper 16mm bore, but this is the second with a weeping brake bleed bolt.  Its not been overtightened by me, but the taper was marred, so I bought a new one.  Looks like the flaw is in the master cylinder body itself, so I'm hooped.  Gonna try something else (stay tuned).