Sunday, January 26, 2014
Waiting...
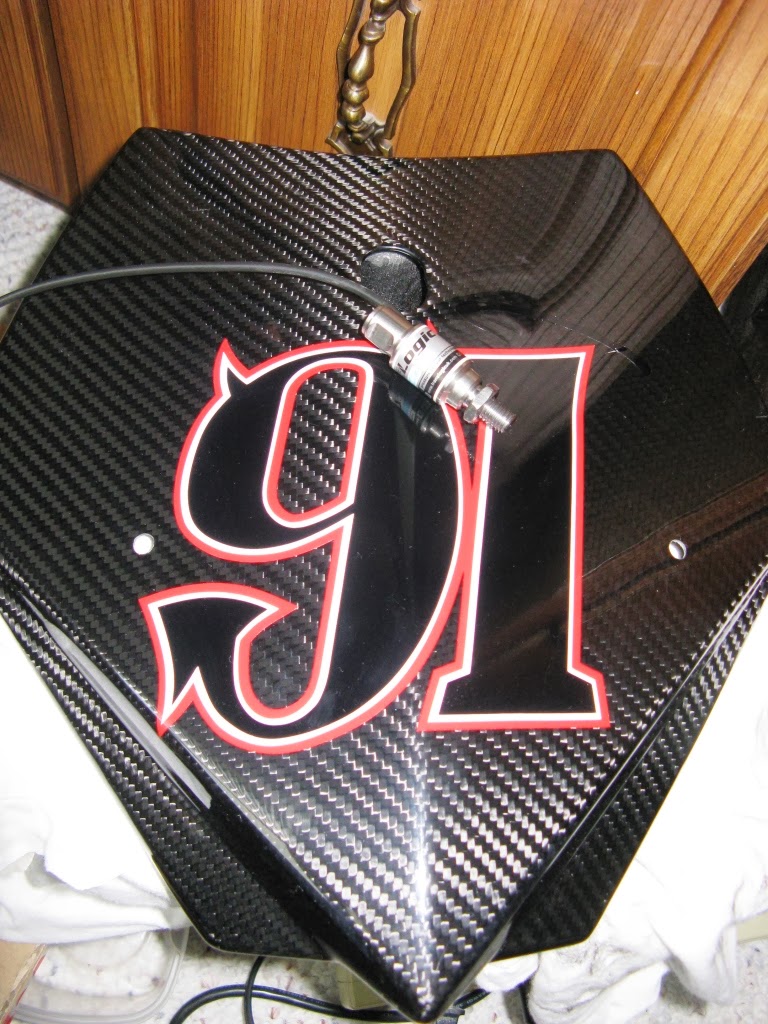
Some new developments and modifications waiting in the wings...
As you can see, I am reverting back to a more "spartan" look in the fairing department. This will be the teaser for now, but that is real carbon fibre, not a "CF look" (as in, fake) part or laminate. I also spent some of my hockey referee-ing wages and bought a translogic quickshifter. While it is the most expensive option (I think), by all accounts it will work far better than the dynojet I tried last year. Its been described that the translogic is a "v. 2.0" evolution of the design, while the power commander version is like a beta model. For some reason, however, the fittings on each side of the quickshifter are m8, not the typical m6. So I need to source some rods and ball ends/rose joints that have metric threads to adapt to this. Not insurmountable, but some more ebay trolling I think has found what I need.
Friday, January 24, 2014
Carbon Fibre Fun


It actually fits quite snugly around the remaining piece, so some Velcro should suit at the rear of the CF piece, and an aluminum strap will lash down the front of the carbon section.

The finish isn't perfect, as the tank section I molded wasn't perfect itself. If it were a show bike, I likely would have ensured the piece I was drawing the mold from was pristine. As it was, it was still OK. That looks like some sort of marring to the finish on the top of the tank but it is the fluorescent light reflected in the epoxy resin. I haven't polished or clearcoated it yet!

Tuesday, January 21, 2014
Piston Broke Racing sticking with Nexx for 2014
Nexx-USA sent out their annual call for sponsorship applications. I was approved in 2013, and really liked the helmet I ordered from them -- at a sponsorship discount. I was pleasantly surprised when my application for 2014 saw me raised to "Top Expert" status, which meant a gratis helmet from Nexx, as well as some swag -- T-shirt and hat. Well, the Fedex man arrived today, and had a present for me.
 I gotta admit I am pretty thrilled. Up until now, the support I have received from the sponsors listed to the right has been very generous -- cut rate deals and discounts on items every racer needs... some in excess of 40% off or more. In this economy, that sort of help really makes a difference. However, this is the first "free" stuff I have ever gotten as a part of a sponsorship package. I can honestly say I wouldn't have pursued this unless I actually liked the product. I think I said last year I have worn or raced in basically every helmet (I think) -- from AGV and Arai to Shoei and Suomy. The Nexx product is as good or better than any I've tried in the past. I think the shape fits my oval head particularly well, and it is incredibly light. The visor change process is simple and straightforward. While I haven't had the chance to test the crash-ability of the lid, I've got every confidence it will do its job.
 The best part for me is that it fits snugly, but doesn't pinch anywhere. In order to get a comfortable fit in other helmets, I've needed an XL, which usually led to a larger shell size, and even some slop in the fitment. I simply don't experience this with the Nexx. I had some choices in style and color, but I went with the XR1R style (same as last year's) in the "Champion green" motif. The red and white of my current leather and bike is supplemented with a bit of green... an Italian theme, perhaps, but I needed a bit of Kawi green! Even though we've still got at least 2 months of winter left up here in Canada, I can't wait. Check out the Nexx link to the right.
Should have some carbon fibre updates shortly... it's looking pretty good so far!
Should have some carbon fibre updates shortly... it's looking pretty good so far!
Saturday, January 18, 2014
Top Triple Returned

Saturday, January 11, 2014
Tank Modifications
As promised, I'll post some pics of my motoGP-inspired fuel tank.
 First, I made a female mold out of fibreglass of the front section, which will be removed. You can't tell by the photo, but the inside surface is quite smooth, following the contours of the tank itself. The seam you can see towards the top of the mold is where I built up the area using electrical tape. This will be the "lip" that mounts to the remainder of the fuel tank.
 Next, the modified tank itself. I wish I could lay claim to some of the workmanship, but I can't. The artists at Cycleboys did the work, even grinding smooth the welds at the joints.
 So this is the new "front" of the tank. The modified tank was pressure tested to 5 psi, which should be plenty, as I think the fuel pump only draws at 3 psi. The gauge of the replacement piece is 18 ga, so slightly thicker than the stock tank material -- however the tank is noticeably lighter, as the front part of the stock tank had considerable material comprising it. A lot of teams mount the ECU under the tank cover, to keep it protected... perhaps mine can go here too?
 This gives you a sense of what the finished product will look like... although remember that the fibreglass piece here is a female mold... the plan is to lay carbon fibre on the inside of it (after polishing the surface with mold release, like I did to the tank), and "pull" the male piece out. Not sure of the fuel capacity, but still plenty more than what is needed for a typical sprint race. The fuel is now retained in the centre part of the bike, closer to the C of G. I'm working on a front tank mount setup, utilizing the two tabs on each side of the tank -- you can see one just aft of the fibreglass mold.
Saturday, January 4, 2014
Waiting...
Not much happening on the bike front currently. Some parts have arrived, and so I spent some time on Saturday playing with the new Koso dash. From what I have seen in pictures, this is the same model fitted to KTM's Moto3 machines... in fact, I am sure of it.
 So, if it is good enough for a world championship-winning race bike, it is certainly good enough for my garage-built special. To left is NOT my bike, but the KTM. Obviously those Austrian geniuses have added a few more lights... I think I might end up doing the same, if I can suss out the wiring harness. Perhaps the FI trouble light, and maybe even a neutral light (although the latter is less important). Oh yeah, I also have domino grips on my bike, so pretty soon it will be hard to tell a KTM moto3 bike and mine apart... yeah right!
 Here is mine, on the kitchen table... If I've figured out the wiring diagram correctly, installation should be a snap -- just splicing in 1 wire that goes straight to the ECU. I'll look at the Kawi manual to find the wire for the FI light, and see if I can't mount an idiot light somewhere. The tach is powered by a 9v battery -- again, perfect for machines that don't run a typical alternator... and for those that do, well, I don't have to hack into the harness to find a 12v hot wire. Pretty slick. I've played with it a bit, and set the signals to work with a 4 stroke 2 cylinder bike. Once it has been on the dyno and the engine broken in and tuned, I'll finalize the shift light feature.
On the more radical front, I hope to be playing with some carbon fibre shortly. I picked up a second fuel tank... I've always felt there was way more volume than needed for race purposes, especially sprint races. Considering a custom aluminum tank would be very expensive, and proper fittings for the fuel pump would need to be made, I decided to simply cut the original in half!
 You can see the cut line (the electrical tape)... everything forward of that will be removed, only after I've made a mold out of fibreglass first (the electrical tape will hopefully act as a "lip" in the mold). I will then get cycleboyz to weld a plate in the front, pressure test it, and I will then seal the tank with POR-15. I might even see if I can't better vent the tank somewhat. Meanwhile the female mold of the front of the tank will be used for a carbon fiber cover, to preserve the lines of the tank and to cover up the air box. It will be attached via Velcro to the tank, and by a bolt just aft of the steering tube.
 Here is the inspiration for this idea, from Rossi's M1... A portion of his tank extends under the seat, right in the C of G... however they needed to carry 24L to deal with the long race distances and thirsty engines. I don't have the same issues to deal with at my level! And of course, if I do go to the Isle of Man or enter an endurance race, I'll be sure that a stock capacity tank can easily be re-installed. I've got a DIY carbon kit coming in (but I can't import it to Canada, so I'll have to pick it up in Rolla), and to save costs, I'm gonna make the female mold out of cheaper polyester resin from Canadian Tire.
So, with no computer aided design, engineering support, or the like, this is "eyeball engineering" at its finest. I anticipate the tank to end up only marginally lighter, but hopefully the weight distribution will be better, and I can be sure the bare minimum of fuel is being added before each race. If I get this done before we head south to Mid America in April, I can test the range of a "full" tank there as well...


On the more radical front, I hope to be playing with some carbon fibre shortly. I picked up a second fuel tank... I've always felt there was way more volume than needed for race purposes, especially sprint races. Considering a custom aluminum tank would be very expensive, and proper fittings for the fuel pump would need to be made, I decided to simply cut the original in half!


So, with no computer aided design, engineering support, or the like, this is "eyeball engineering" at its finest. I anticipate the tank to end up only marginally lighter, but hopefully the weight distribution will be better, and I can be sure the bare minimum of fuel is being added before each race. If I get this done before we head south to Mid America in April, I can test the range of a "full" tank there as well...
Subscribe to:
Posts (Atom)