
Note the bondo, epoxy repairs, and lines drawn to indicate where material has to be removed...


 So, imagine this paint scheme... the red becomes the Irish Lucky green, and the grey (which looks black in this photo) the golden yellow... all on a white background. Might end up looking like a "Skoal Bandit" bike, or a "Kool" tobacco paint scheme from a distance. We'll have to think on it a bit.
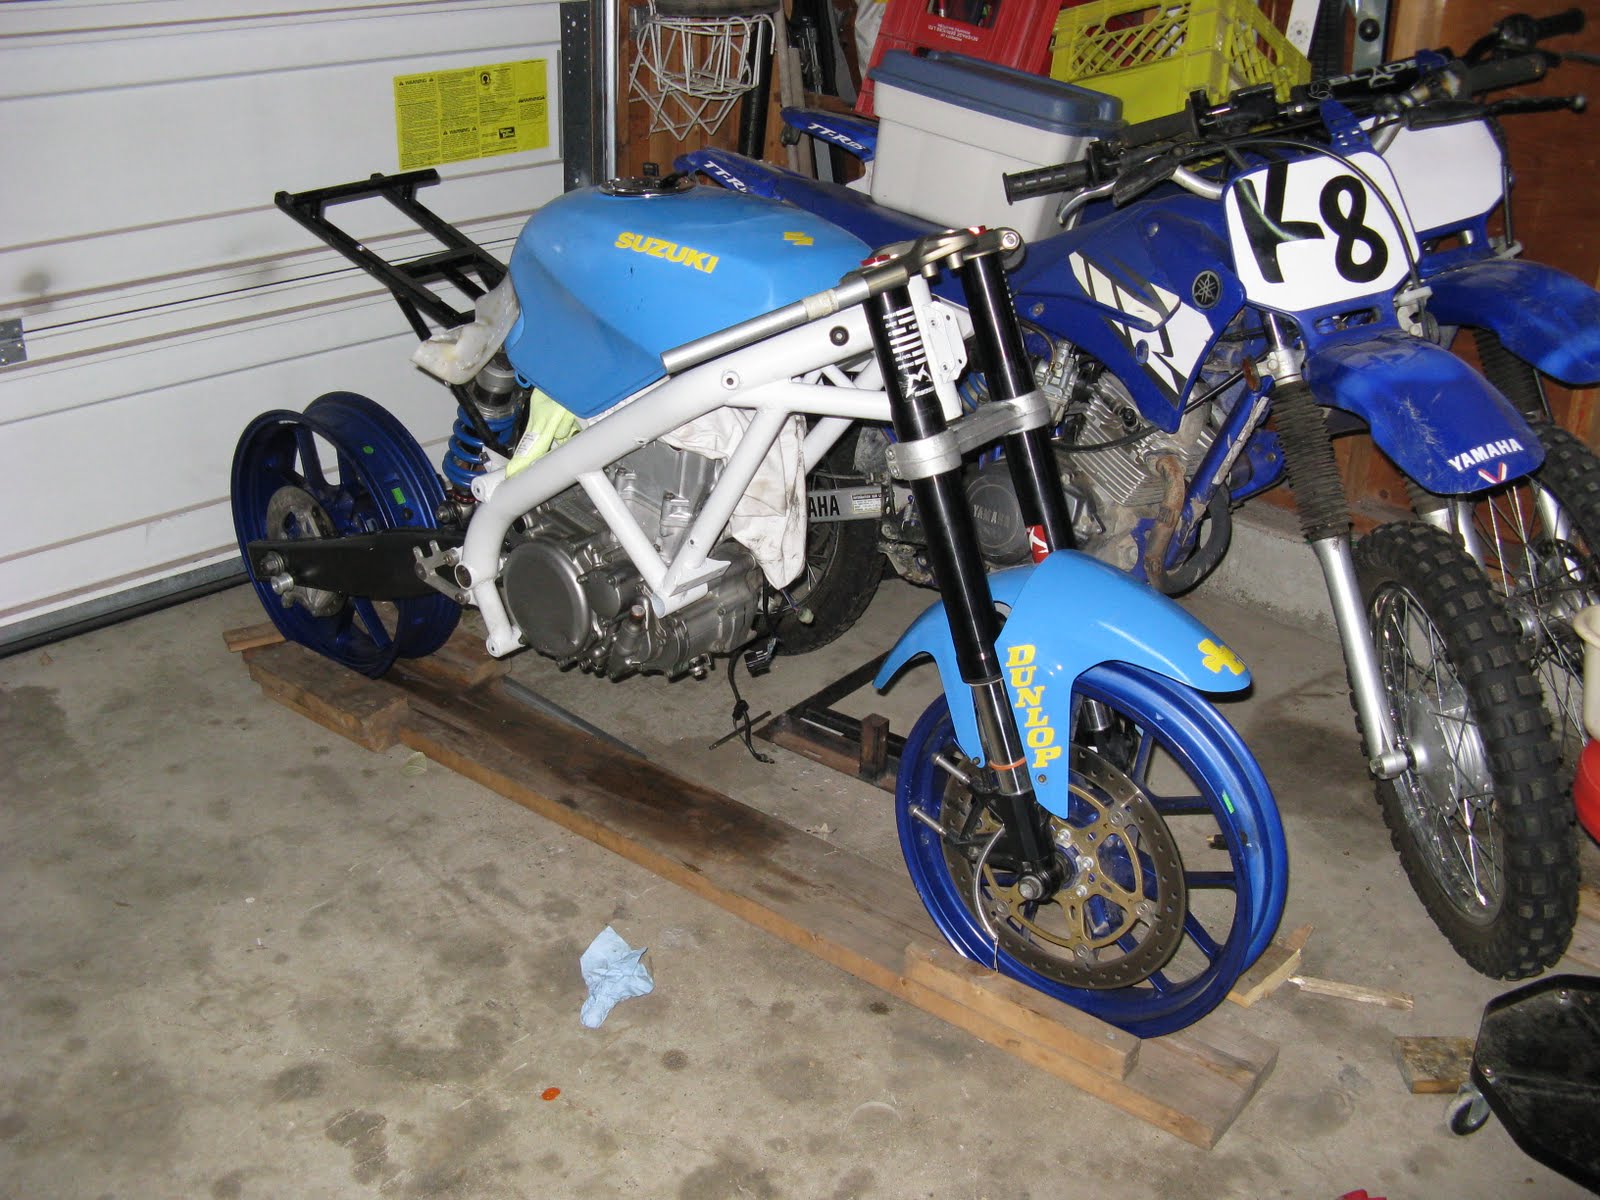


 Mad Duc Rearsets
 Progress-- when I decided to call it quits tonight.
 Headlight cluster.
 Clean!
 Needle bearings re-packed prior to reinstallation.
 Cleaned and oiled the air filters.
 Re-greased swingarm pivot rocker.
 Several metric bolts sacrificed themselves to plug threaded tabs on the frame. Luckily after the last 13 or so years of riding and wrenching, I never threw anything out. I'll keep these too, for the next time I need something coated.
 Past experince has shown me how much a few mils of powdercoat will muck with the fitment of the engine, swingarm, and other parts during reassembly. So, I went at the frame with the dremel tool and a nice, 80-grit sanding drum. Didn't want to take off any metal, but had to remove the coating for the engine to fit properly. If you don't, things get damaged and "chunks" of coat will come off like shards -- like an eggshell and ruin the finish in areas you can "see". This avoids that... although it is tedious work!
 The first shows essentially the rolling chassis starting to come together, sans engine. At first, I wasn't too thrilled with the primer coat on the frame and swingarm. Seemed to be perpetually soft, and just moving it around the garage saw both get marks on the primer, although nothing went through to the bare metal underneath. However, after a couple of weeks, the primer seems to have cured properly. Plan is to leave it like this until I am sure the frame will hold together, crack free.
 As I tried to describe, by mixing and matching swingarm bearings and bushings between a DRZ400 and the Aprilia Pegaso (the swingarm), surprisingly the parts mated together. Now I can have "proper" torrington/needle bearings with a hardened spacer pivoting within, and the correct 17mm shaft running though the engine. No bronze bushings for me -- the tolerances are much closer, and brings the mechanism into the 1980s! Like I may have stated, old 70s TZ250s had bronze bushings slip-fitted to axles. Old school! Now I need to get some spacers machined to install outboard of the swingarm -- pretty sure the spacers I had for the inside arms of the swingarm should work. Need to get the engine installed first, and then measure it.
 This is a pic of the Hyperco CBR600 shock I got from the UK. Proper rebound and compression damping, as well as a threaded preload collar, not the stepped one of the stock shock -- will allow for more accurate adjustment. As well, the design of the lower eyelet will let me use a simpler, lighter, and "cleaner" alloy spacer than the mix and match steel sleeves and washers I had used last season.
 My faith in "hammered" paint has taken a hit as it has not held up nearly as well on the swingarm as I had hoped. I had properly prepped the primer coat, and painted it inside, but with any "stress" it came off -- however the primer coat held up all right. This pic shows the smaller alloy rear sprocket I got from AF1 (will be going with a 15-37 rather than a 16-40), and the swingarm bobbin I installed prior to it being painted. Will allow for a much more secure mounting on the swingarm stand.
 If you are a fan, you know that Rossi already had the title wrapped up, but the last ever 250 GP championship was still up for grabs. Turns out Scot Honda rider Aoyama won, after running off track and dropping down to 11th. He needed to maintain that spot if Simoncelli won, but the Gilera rider dumped it at about 2/3rds distance.
 My slight brush with fame took place at the MotoGP race at Indy. We went to the local steakhouse for dinner after checking in, and ran into the members of the Scot Honda team having dinner. Not sure if they wreched for DeRosa, or either of the back of the pack MotoGp riders (a Japanese and/or a Hungarian) but their shirts were right, and they were having a lot of fun. Not sure if we understood each other, but they were obliging at least!
 This picture probably looks a bit familiar -- both of my road bikes are in pieces, with engine work to be done, and frames to be painted. Two at a time seemed reasonable! The supermono frame and swingarm were locally sandblasted and then primed. I am going to leave the frame in primer for now, using the light grey paint to allow me to inspect for any stress cracks over the next few seasons. The rear swingarm will be sprayed black with "hammer" paint.
  I was also able to get the cylinder on the 'mono honed, and it was installed on the case with the new rings, E base gasket, and a liberal coating of oil in the cylinders and on the piston. Waiting for the heads to come back from Sinceros Speed Works. Eddie emailed to say he had recieved the heads and cams -- he just needs to install the valves, new rings, and shim the cams on the bench and send it back. Oh yeah, and I need to give him some money.
 This hammertone or hammerite paint is pretty good stuff. Needs a decent couple of coats to really do the job, but it is fairly durable for a rattlecan. About as good as you can get short of powdercoating. On an amazing side note, by using DRZ400 bushings and Aprilia Pegaso torrington bearings, I can do away with the bronze bushings I farted around with for so long last winter... combining the two allows me to use the 17" bolt that also works in the engine case. No more "slip fit" engineering -- the proper torque can now be used attaching the swingarm. More pics in the future will explain.
 And speaking of powdercoating, the Ducati frame is off to get recoated gloss black. Meanwhile the engine is on the bench, getting ready to take a trip into Winnipeg. When all was said and done pricing out tools, gaskets, and opening and closing shims, I have decided to let the local Ducati dealer (Wildwood) do it for me. The labour costs will be cut down drastically because the engine is out of the frame. As well, the proper tools and shims are at their disposal, so the turn around time should be much quicker. And when they are done, they can re-set and re-tension the belts. I have been quoted "no more than 4 hours @ $80/hr". Hopefully they come in under the budget. If not, I will certainly make no bones about it!
 As a part of the top-end service, I am dropping the engine out of the frame. This is by no means necessary -- the 999 series is known for its service friendly design... its just that in a few weeks, it will get bloody cold in the garage, and I wanted to take my time and work on the engine inside! Was able to remove the engine in pretty quick order, once I had a way to prop up the rear part of the main frame. A support base I originally built to steady a bike on a trailer was pressed into service, with the frame being steadied by bolts threaded into the rearset mounting holes. Put a jack under the engine and the unit dropped out. Hey, presto, and Robert is your father's brother! (Bob's your uncle...) Looking at the paint on the frame has got me thinking I might make a trip to the powdercoater's while I have it all apart... would look pretty cool in a gloss black.
 Note how "short" the exhaust headers are -- not nearly as long as on other supermono designs. The muffler itself starts just aft of the rear part of the engine -- a tapered cone that extends onto the carbon-fibre bit. Interestingly, Yoshimura designed a 1-2 design -- there is a matching muffler exiting on the other side of the bike (just visible above the rear wheel) -- anyway, this proves that there is some merit to a shorter header design.
 I did take the cylinder itself off as well, and everything appeared to be in good condition. The cylinder will get a quick hone with a ball hone -- the cross-hatch marks could be seen, but there were a few streaks of increased wear in a few spots. Nothing major. I did check and the piston ring end-gap was well within specs -- not sure if it was the original piston or not inside. The piston is marked ART, which is an aftermarket supplier. However, sometimes when these companies grow they become OEM suppliers as well.
 I did get in the necessary supplies to properly rebuild the top end. New base and head gasket, a piston circlip (got a couple extra while I was at it), an new set of rings (ouch!), and that's about it. I decided to get the thinner "E" base gasket, which will increase compression somewhat. Might add 1/2 a hp -- but I always put premium fuel in the bike at all times, so pinging won't be an issue. Haven't sent off the heads yet, as I am still waiting on the cams to arrive. Perhaps I can time the assembly for when Dad or brother Tim show up -- an extra hand threading the timing chain through the head would be helpful!
 As promised, I bought the "rights" to the digital photos that Rob Bye took at the track. Again, a pretty weak angle of lean, but I am exiting turn 5 in this shot... I know I had the machine heeled over much farther than this! As well, I've spent a total of about 8 minutes on the bike on a track... excuses, excuses!
 But, I really don't want to creat a situation like this... even though it is a racebike, and I'm a MotoGPwanna-B... will continue to do some research. I'll see what the cycleboyz guys say. Right now, I'm leaning towards 1 3/4" tubing, and shortening up the whole assembly, although I don't think I can fit a 26" header and exhaust under the engine -- it'll be a bit longer, and attach to the right peg. This saves me monkeying with the rear seat subframe -- the muffler attaches to the peg assembly like on the Gixxer above. I think I can also shorten the TwoBros muffler I have to suit... and by shortening it in the right place, I can cut out the area that was damaged in the previous owner's crash. As always, stay tuned. The frame and swingarm should be back from the painter's in a couple of days.
 Congrats, Lennon. As well, my buddy Wilson won the Canadian Thunder Championship, although it was not without drama. His TZ250 had engine troubles during the 600 race, and so he had to borrow an SV650 from Bob Bais. His 7th place on "the couch" was enough to win the MRA championship and the CMA championship by 2 points. There's sportsmanship! The photo to left is the last thing riders see before they head onto the track. Poor things!
  The guys were teasing me a bit and calling me "Vermulen". No way man, Capirossi all the way!
 Roland Sands' new KTM 450 450moto bike. Nice. Spent more on the paintjob than I have with my machine (almost...). Took a pretty close look at the Racetech modified forks, and the shortened rear shock. Reminds me about what Dave Pearce said about the poor geometry with slapping on a set of 600 forks. Woulda liked to hear it run. Some passing interest from the others fans I saw, but most of the Yanks were looking at the RC8s.
 Ran into Eric Bostrom. Was walking around near the Yamaha and Speedvision tents pretty incognito. I think he was touched that a few people recognized him. Wanted to ask when he was coming back, but why would anyone come back to the AMA at this point. He was always a good 600 rider; maybe he should head to Moto2? Just said, thanks, shook his hand, and walked away. Seemed like the "nice guy" we all saw on TV. Guess he's headed back to Brazil to work on his Coffee plantation or whatever...
 Our seat location was based on advice from Wilson and Cherie, and it was good! We sat together on Sat and Kate joined us for the races on Sunday. Good weather! I'm not trying to avoid them -- the "gap" in the stands was where Kate was sitting... Note the bedouin fashion statement by yours truly -- trying to avoid a sunburn... success!
 One of the photos we snapped with the digital camera. Brought mom's Canon and huge zoom lenses to Laguna, but stuck with the wee one this time. Not bad, considering. Photo courtesy of Kate, I had the video camera.
 I think I took this one. After Rossi and Dani P crashed, it was a bit of a processional for Jorge. However, like Laguna in 05, the entire contingent was willing Nicky H to hold onto 3rd and get a podium, which he did.


