The new loom from Track Electronics showed up. While I didn't take a before and after pic, these two might suffice...
These two hopefully give you a sense of how much surplus wiring is present in the stock harness. The ECU is normally located under the passenger seat. Considering that hunk of pig iron has long since been removed, I was running out of space to jam the wiring harness, once I'd located the ECU to under the seat.
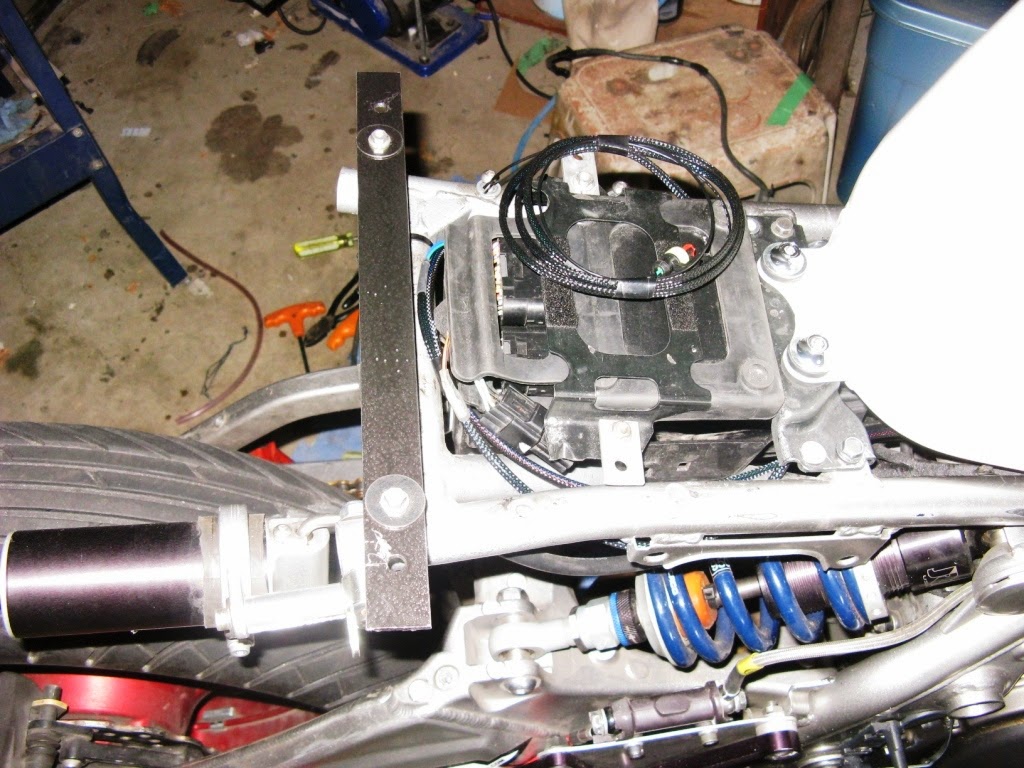
This is the what is left of the rat's nest... the coil of wire still present on top of the ECU is actually for the translogic quickshifter. You can see that "just enough" of the harness was left intact. The entire fuse box was removed, as well as a pile of relays, and what is left is quite minimal. All of this wired into the zx6r on/off switch that I already had, eliminating the keyed switch (which I already had removed) as well as the 2nd on/off switch I had replaced it with. Looks like a proper race setup! Throughout the harness are a bunch of neat details that shows John knows what he is doing. Far less hassle, and much lighter in the end.

With the temps still freakishly cold for this time of year, I have yet to start the bike and check the new koso gauge. However, by searching on forums, I did wire it up according to how others wired up their koso products (although not the identical gauge). By all accounts, it should work, but I need to wait and see for sure. You'll note I also have two additional idiot lights present. The red is wired into the oil pressure sender, and the green is for neutral. LED lightness, and I did test to see if the neutral goes on/off (it does), and the red oil temp comes on with the switch... I need to see it go off when I fire the bike up. I also purchased a "proper" mount for the lap timer. You can also see the RHS switch... jubilee clip is a safety to prevent the bike from actually being turned on and draining the battery.

The knock-on effect of upgrading and modifying is that often one thing leads to another. When I sold my Arrow Evo exhaust, I was going to run the Leo Vince system with the stock headers and wait until a set of Arrow headers came available. However, a new set for nearly 50% off showed up right away. I purchased them, incorrectly thinking that they would sit tight to the front of the engine, allowing the R6 rad to still be used. Unfortunately, no. In order to get the proper length, these tapered headers sit out from the front of the engine too far to allow for the R6 rad.... it would foul the front wheel on braking. So, in order to reap the HP benefits of the Arrow headers, I needed to revert back to a stock-sized rad. So in this case, I thought I'd really gamble and buy something from China.

Ebay had a few rads listed for ex650s for sale from China, with the added attraction that they were 30% larger in capacity, and "tig welded throughout". With the MAM weekend not that far in the future, I ordered one. Amazingly, it was here within the week, and cost just under $90 DELIVERED. The quality looks quite good, considering the price. The welding is decent, but not beautiful. It certainly appears to be the stock shape, but...
... as you can see it is much thicker. This obviously accounts for the increased volume. I also picked up an aluminum threaded bung that will work with the koso sender, so I will drop the rad off at Cycleboyz this week so they can weld it in place. Based on the hole I drilled to make the bung fit, the aluminum is decently thick and not soft. I need to wait for some hoses to come in to mount it, as I ground off all the stock rad mounts (HAHA!) to make the R6 rad fit. I can likely come up with a lighter solution anyway.
Next up was the quickshifter. Seemed like a basic plug-and-play setup, although the instructions were pretty vague. They were "universal" in that they were written to cover all of their QS models, so it refers to a positive wire that doesn't exist on my kit. There is an LED on the controller, but that only lights when the bike is running. Will have to wait.
While the rad hasn't been fitted, I think I have found a good spot for the overflow bottle. I was able to tuck it behind the front number plate with a lightweight strap, and use one of the plate mounts to pull double duty, securing it in place. Will need to plumb a line from it to the rad, when the rad has been secured.
Front view... for some reason, I can't seem to flip the pic upright. You get the idea, however. The plan for the powercommander module is to secure it under the carbon cover, above the airbox. Hopefully the last parts arrive in time to finish the bike for MAM in mid-April. The weather is so poor this year that round 1 at Gimli (May 2-3) has officially already been cancelled. At the rate of melt, there is no way the snow will be gone by then. So hopefully I can complete the bike, get a few more heat cycles in the engine before loading it on the trailer, and then head south!


