Friday, November 27, 2009

Ch-ch-ch-changes....

Need to change things up a bit.  I think I am going to create another blog, to highlight the purchase and work done to my next bike -- it should be in my garage Sunday evening.  It's been a hard week without streetbike, but I think I have a good replacement for the Ducati lined up.  So, from here on in, this blog will concentrate on the 'mono, and the other blog will cover the streetbike.
The only mono news this week is that I got some proper spacers machined for the rear end -- the swingarm pivot area, and the rear shock.  Fairly straightforward, but shop time costs money, and a bit more of my wages went to Atom-Jet.  They are, as I've said before, a great bunch of people to deal with, so I have no problem sending work their way.  As much as I've spent there over the years, it is still far less than a proper lathe and mill... so far.

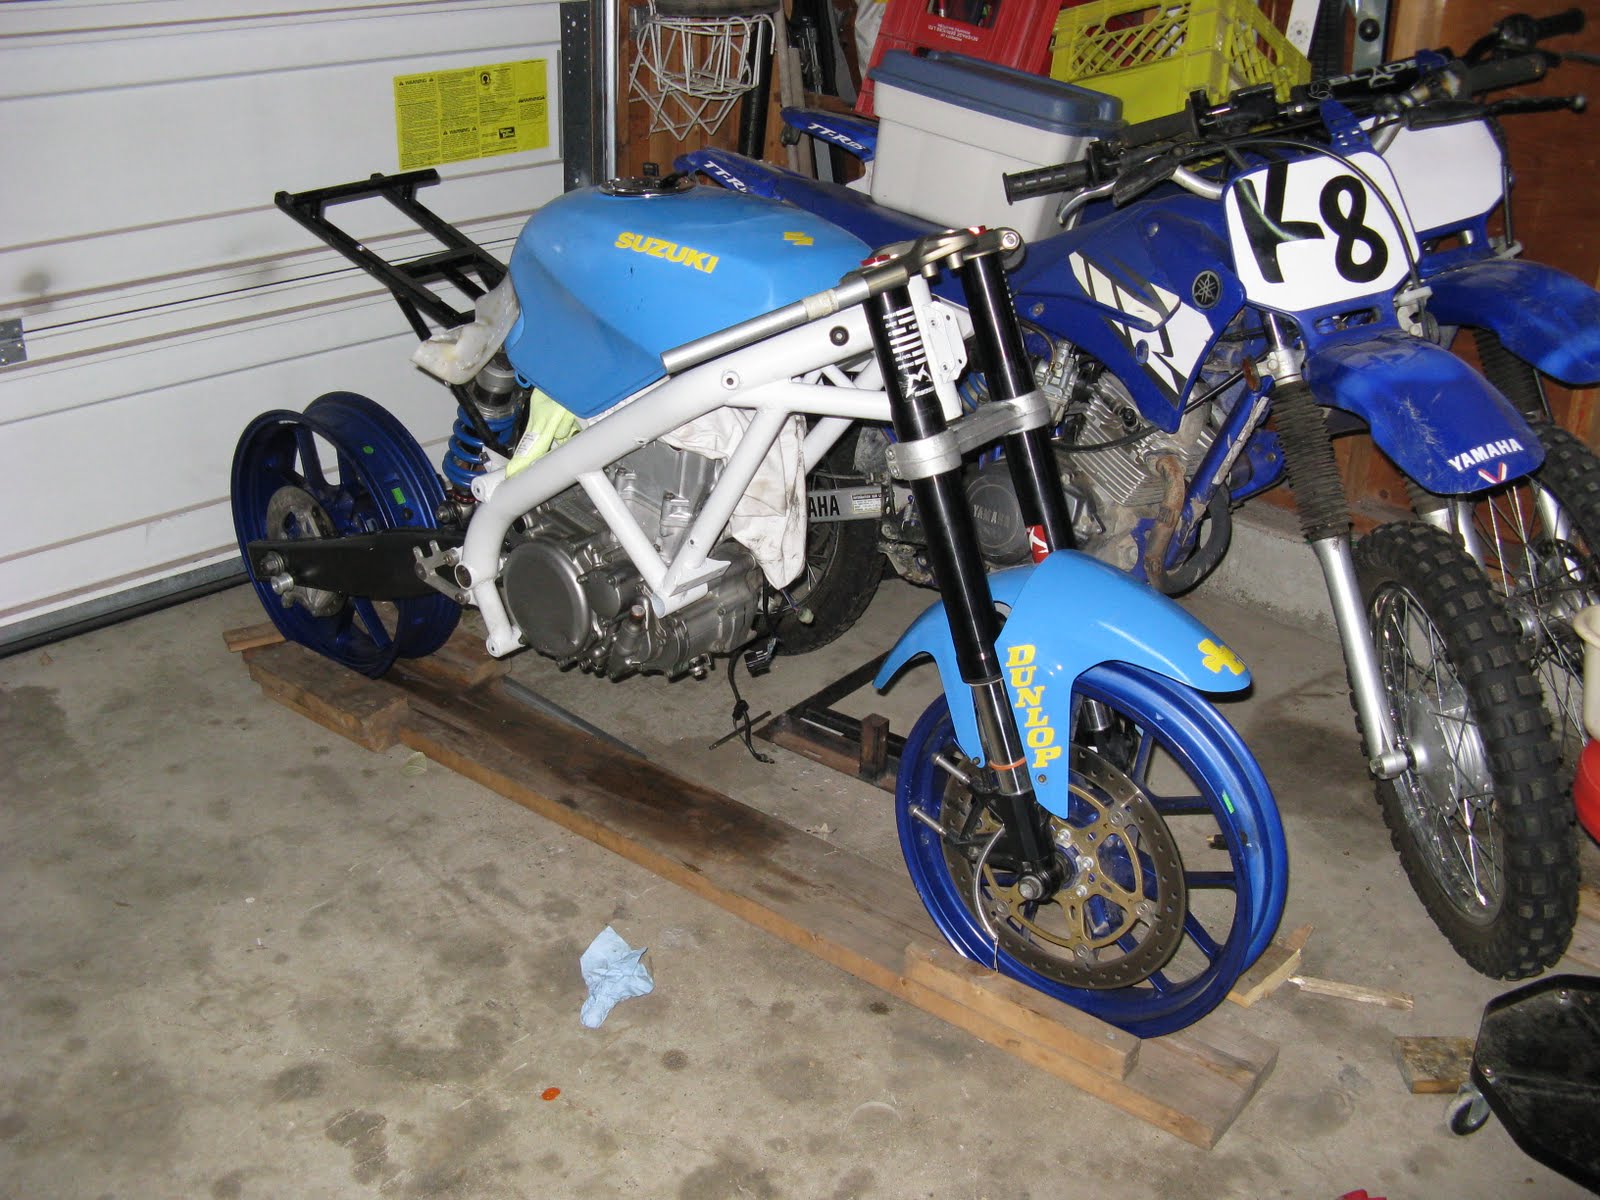
This is the bike as it sits right now -- tires are off, to protect them from the coming cold temps.  Probably not necessary, but I'd like to get another season out of them.  Rear subframe is in place with new bolts -- proper chrome and/or anodized steel ones, as the black ones I used from Canadian Tire started to rust.  Looked pretty weak!  Tank is also in place -- to the rear you can see a white chunk of plastic -- that is a seat pan from an EX250 -- I've cut most of it away, but the front part of it transitions from the seat subframe to the rear of the tank -- my several attempts at fibreglassing something to work all failed.  Cost me 5 bucks.  Worth it.  Need to mold it into the tail section.


This is the spacer arrangement from the engine to the swingarm pivot shaft, to the frame.  Sprockets line up perfectly, and with the bushings, I can snug the swingarm pivot bolts down properly.  No "NTFT" tourque settings.  Everything was well-greased before putting it together.  There are even some rubber bushings in there to keep grime out; this being a racebike, however, I'll keep a close eye on everything back there!  The rearset plates are in place to start to eyeball where the mufflers are going to hang -- see Yoshimura exhaust pics from an earlier post to get the idea.


This is the aluminum spacer that positions the lower clevis of the rear shock.  This is quite the unit -- it has adjustable preload, rebound damping, and hi and low speed compression damping... I think -- there are two adjusters on the remote resevior.  Pretty trick, for a pretty cheap price!  I snugged up the spring preload -- I think the spring rate is correct, or darn close for this application.  There is no oil weeping on the shaft, so I think it is fine as is, not needing a rebuild or anything.  The line to the remote resevoir is a bit short -- the other shock were all far too long... so I might have a fight on my hands hanging it neatly to the subframe.


Came across this paint scheme when I was surfing the net.  Always liked the look of the Gulf race cars.  One of Dad's fellow flyers was a bulk Gulf fuel distributor in my hometown, so I remember seeing the logo at a young age around the airport.  If the Supermono gets to the next level of reliability and handling, it will need race bodywork with an oil-retaining bellypan.  Armourbodies in Alta makes a set for the RS50, so perhaps this might be the next paint scheme.  I've always liked the retro look.

Sunday, November 22, 2009

gone!


My long history with Ducati is over, for now (although perhaps for good). It was lots of fun. I learned a ton of information, skills, and mechanical knowledge. I understand how desmodronics work, and that they are nothing to be afraid of. I successfully bought, rebuilt, modified, raced, and won on a Ducati. I helped people with other Ducatis. I toured on a Ducati. And yesterday, I sold my Ducati. I'm pretty sure it went to a good home -- the new owner followed the blog as to the rebuild, took it for a test drive, and comfortably paid my asking price. I think we all came out happy.
Now what? If everything goes according to plan, another v-twin is in my future. Stay tuned. I'll have to perhaps change the name of the blog, or even start another one, because I want to keep my massive following (2 people and counting!!!!) up to speed on the supermono as well.

Sunday, November 15, 2009

done!

The Ducati is back together!


Front 3/4 view.


Darn! That's a fine looking machine!


Wednesday, November 11, 2009

more pics

Mad Duc Rearsets


Progress-- when I decided to call it quits tonight.


Exhaust and clean rear wheel!


Headlight cluster.


Clean!


Needle bearings re-packed prior to reinstallation.


Cleaned and oiled the air filters.


Re-greased swingarm pivot rocker.


Tuesday, November 10, 2009

Come together

I'll let the pics speak for themselves.


Monday, November 9, 2009

Ducati again


Got the frame back from Cycleboyz today. Happy with the result. Nice, thick, glossy, durable clearcoat. All frames should be painted with this!


Several metric bolts sacrificed themselves to plug threaded tabs on the frame. Luckily after the last 13 or so years of riding and wrenching, I never threw anything out. I'll keep these too, for the next time I need something coated.


Past experince has shown me how much a few mils of powdercoat will muck with the fitment of the engine, swingarm, and other parts during reassembly. So, I went at the frame with the dremel tool and a nice, 80-grit sanding drum. Didn't want to take off any metal, but had to remove the coating for the engine to fit properly. If you don't, things get damaged and "chunks" of coat will come off like shards -- like an eggshell and ruin the finish in areas you can "see". This avoids that... although it is tedious work!
Engine comes home tommorow!

Sunday, November 8, 2009

Reassembly

Thought I'd post some pics of the reassembly of the Supermono.

The first shows essentially the rolling chassis starting to come together, sans engine. At first, I wasn't too thrilled with the primer coat on the frame and swingarm. Seemed to be perpetually soft, and just moving it around the garage saw both get marks on the primer, although nothing went through to the bare metal underneath. However, after a couple of weeks, the primer seems to have cured properly. Plan is to leave it like this until I am sure the frame will hold together, crack free.


As I tried to describe, by mixing and matching swingarm bearings and bushings between a DRZ400 and the Aprilia Pegaso (the swingarm), surprisingly the parts mated together. Now I can have "proper" torrington/needle bearings with a hardened spacer pivoting within, and the correct 17mm shaft running though the engine. No bronze bushings for me -- the tolerances are much closer, and brings the mechanism into the 1980s! Like I may have stated, old 70s TZ250s had bronze bushings slip-fitted to axles. Old school! Now I need to get some spacers machined to install outboard of the swingarm -- pretty sure the spacers I had for the inside arms of the swingarm should work. Need to get the engine installed first, and then measure it.

This is a pic of the Hyperco CBR600 shock I got from the UK. Proper rebound and compression damping, as well as a threaded preload collar, not the stepped one of the stock shock -- will allow for more accurate adjustment. As well, the design of the lower eyelet will let me use a simpler, lighter, and "cleaner" alloy spacer than the mix and match steel sleeves and washers I had used last season.


My faith in "hammered" paint has taken a hit as it has not held up nearly as well on the swingarm as I had hoped. I had properly prepped the primer coat, and painted it inside, but with any "stress" it came off -- however the primer coat held up all right. This pic shows the smaller alloy rear sprocket I got from AF1 (will be going with a 15-37 rather than a 16-40), and the swingarm bobbin I installed prior to it being painted. Will allow for a much more secure mounting on the swingarm stand.

In other news, I got word from Eddie Sinceros that my new valves and springs are installed in my cylinder head, and the whole assembly is on its way back to me. When it arrives, I'll install it on the engine, check the valve timing about 100 times to be sure, and install it in the frame. Again, the OEM manual and copious amounts of online help and photos should make the process a bit more idiot proof. I did see the results of a European dude who had sent his heads to Eddie to get the same work done, and screwed up the timing. What a mess! Again, all the research indicates that this is the "best" mod to do to the DRZ to make it bulletproof for long-term high revs usage.
On the Ducati front, the frame has been powdercoated. Saw it on the weekend, but they forgot to mask the inside of the steering stem. They're going to remove the powder for me, and I'll pick it up between Drs appts on Tuesday this week. Looks really good -- thick, durable coat of powder -- bomb proof! Will post a pic when I get it home.
If you are a fan, you know that Rossi already had the title wrapped up, but the last ever 250 GP championship was still up for grabs. Turns out Scot Honda rider Aoyama won, after running off track and dropping down to 11th. He needed to maintain that spot if Simoncelli won, but the Gilera rider dumped it at about 2/3rds distance.


My slight brush with fame took place at the MotoGP race at Indy. We went to the local steakhouse for dinner after checking in, and ran into the members of the Scot Honda team having dinner. Not sure if they wreched for DeRosa, or either of the back of the pack MotoGp riders (a Japanese and/or a Hungarian) but their shirts were right, and they were having a lot of fun. Not sure if we understood each other, but they were obliging at least!

Monday, November 2, 2009

OUCH!

Spoke with Dustin today at Wildwood sports. He split the difference on the time quote -- originally said 4, and it took him 6. ALL valves were out of the newer (post 2004) Ducati spec -- new figures state that the clearances have to be much closer than originally called for.
So that's: 5 hours at $80/hr, along with 8 closer and 8 opening shims -- the far side of $600.00 Hmm. As well, the cost to powdercoat the frame (properly) is about what I expected -- $425. Not for the paint, but for the time, ensuring the trellis tubing is all covered. Both can be picked up shortly, although my schedule is such that a Saturday off isn't for awhile. As well, the minor consumable parts I ordered also have to come from Italy, so it may be a couple of weeks before I get stuff back home.